
 Pin it
Read the panel orientation before sewing this textured square crochet cushion.
Source: Yarnspirations, Ridged Birch Crochet Pillow (BRC0520-028876M).
This independently written planning companion uses US crochet terminology. The accompanying Reel is an AI-generated illustration, not a verified finished sample or a stitch tutorial. The complete pattern is not reproduced here. Find the official PDF on Yarnspirations by its exact name and code for executable instructions.
Read the material and size specifications
The Easy pillow is approximately 18 inches square and uses two 225 g/428 yd balls of Bernat Suede-ish in Birch Beige. The PDF specifies a 6 mm hook, an 18-inch pillow form and twelve ¾-inch wooden buttons. Pattern gauge is 14 stitches and nine rows per 4 inches; a separate single-crochet gauge is also printed.
Understand the construction
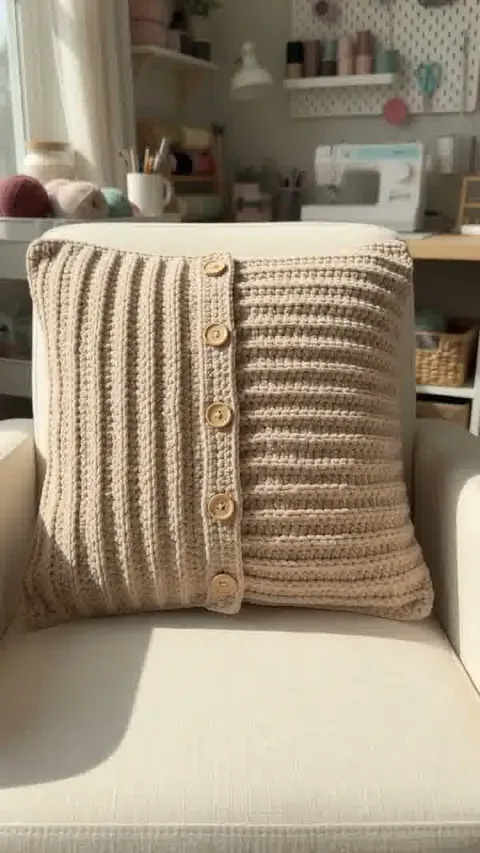
Half double crochet worked into its front horizontal bar forms the ridges. One piece has buttonholes and another has matching button positions. The pieces are folded and joined so button rows fall near the middle of the front and back, with the ridge directions meeting at right angles.
Label both sides before sewing
Use removable labels to distinguish the button side from the buttonhole side. Lay them beside the finishing diagram and check ridge direction before attaching any buttons. A simple rotation changes the finished appearance.
Test a button in the sample
Try the intended button through a sample opening. It should pass through without forcing and remain secure when the fabric relaxes. The illustrated button count is not a substitute for the full finishing instructions.
Fit the cover around the form
Pin the side seams and place the form inside before final closure. Keep the fabric relaxed so the ridges remain visible and the button bands do not bow. Check the front and back openings independently.
How to read the illustration
The illustration shows five visible buttons instead of the PDF’s six, and a smoother rib texture. The vertical and horizontal rib directions suggest the layout; the close-up is generic edge work rather than the specified front-bar half-double-crochet repeat. Use the official PDF for the complete construction and stitch sequence.
Before You Start
Keep the official PDF, your measurements and your swatch notes together while planning the project.