
 Pin it
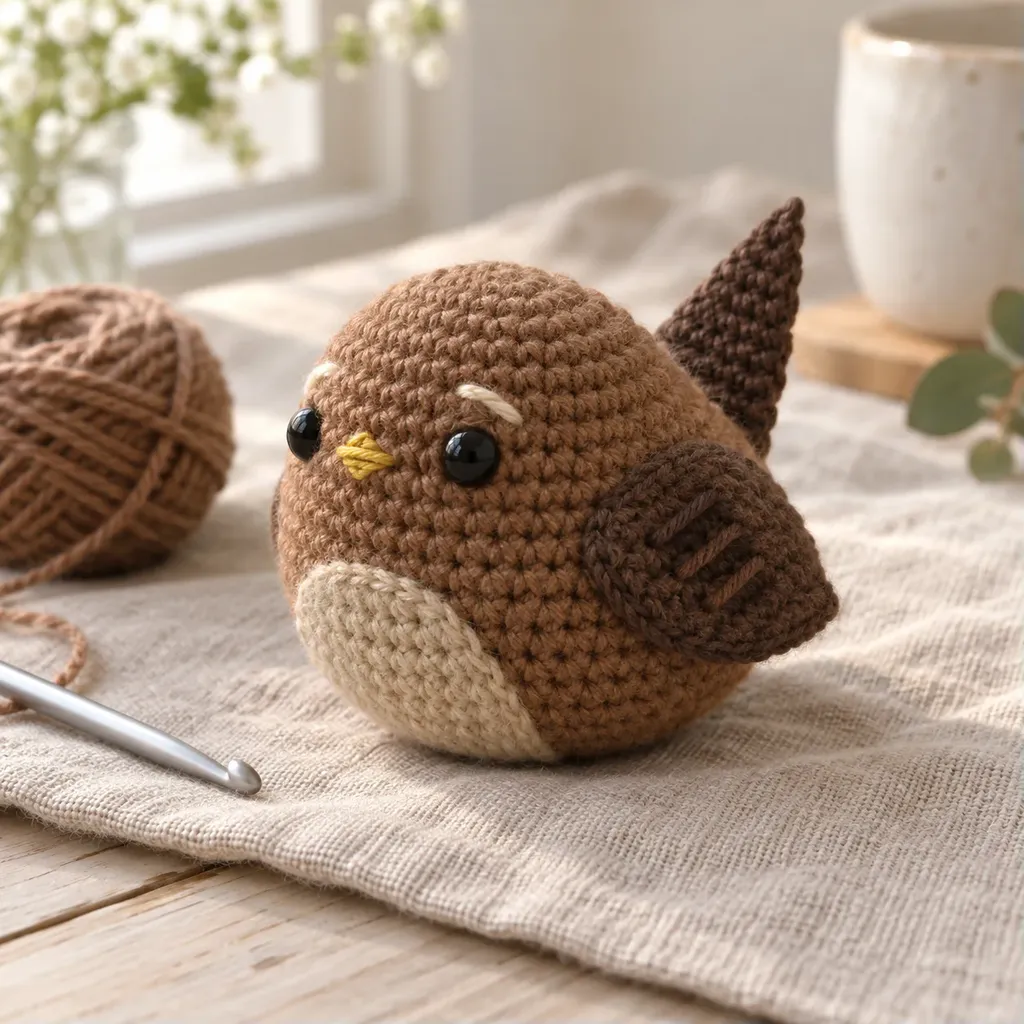
I love the tidy shape of this amigurumi wren bird crochet pattern: a round little body, a gentle head, flat wings and a jaunty tail. It is small enough for a relaxed evening project, but still has sweet details like wing bars, a pale brow stitch and a tiny embroidered beak.
Why you'll love it:
- Beginner friendly: the main shape uses sc, increases and decreases in steady spiral rounds.
- Small finish: the wren is about 4 in (10 cm) tall, so it makes a quick shelf-size bird.
- Low sewing: the body and head are worked as one piece before the wings and tail are added.
- Nice practice: the flat pieces are simple rows with gentle shaping.
- Easy to personalize: change the brow, belly or wing-bar colors for a softer woodland look.
This design keeps the bird rounded and simple, with the wren character coming from the short upturned tail, dark wing bars and warm brown cotton. I use a smaller hook with worsted yarn so the fabric stays firm for stuffing.
Pattern details
Skill level Easy
- Finished size
- About 4 in (10 cm) tall from base to head and about 3 in (8 cm) long including the tail
- Time to make
- 2-3 hours
- Yarn weight
- 4 · Medium
- Hook
- 3.5 mm (US E-4)
Gauge
Gauge is not critical; work tightly so the stuffing does not show. In this pattern, Rnds 1-5 of the body measure about 1.75 in (4.5 cm) across.
Yarn
- Worsted weight (CYC 4) cotton in warm brown, about 60 yd (55 m)
- Worsted weight (CYC 4) cotton in tan, about 12 yd (11 m)
- Worsted weight (CYC 4) cotton in dark brown, about 18 yd (16 m)
- Worsted weight (CYC 4) cotton in golden yellow, about 3 yd (3 m)
- Worsted weight (CYC 4) cotton in cream, about 2 yd (2 m)
Materials
Abbreviations (US terms)
- Rnd(s)
- round or rounds
- Row(s)
- row or rows
- ch
- chain
- sc
- single crochet
- inc
- increase: 2 sc in the same stitch
- dec
- single crochet decrease over the next 2 stitches
- sc2tog
- single crochet 2 stitches together
- st(s)
- stitch or stitches
- yd
- yard or yards
- m
- meter or meters
- mm
- millimeters
- oz
- ounces
- g
- grams
- in
- inches
- cm
- centimeters
Pattern notes
- Use US crochet terms throughout the pattern.
- Work the body and head in continuous spiral rounds; do not join unless a line says to.
- Move the stitch marker up at the end of each round.
- The wings are made twice, and the second wing should match the first before sewing.
- For a toy intended for a baby or toddler, embroider the eyes instead of using safety eyes.
Tap a round to tick it off. Your progress is saved on this device.
You're welcome to make and sell items from this free pattern. Please don't copy, translate or republish the pattern itself; share a link to this page instead.
 Save
SaveCrochet the body and head in one piece
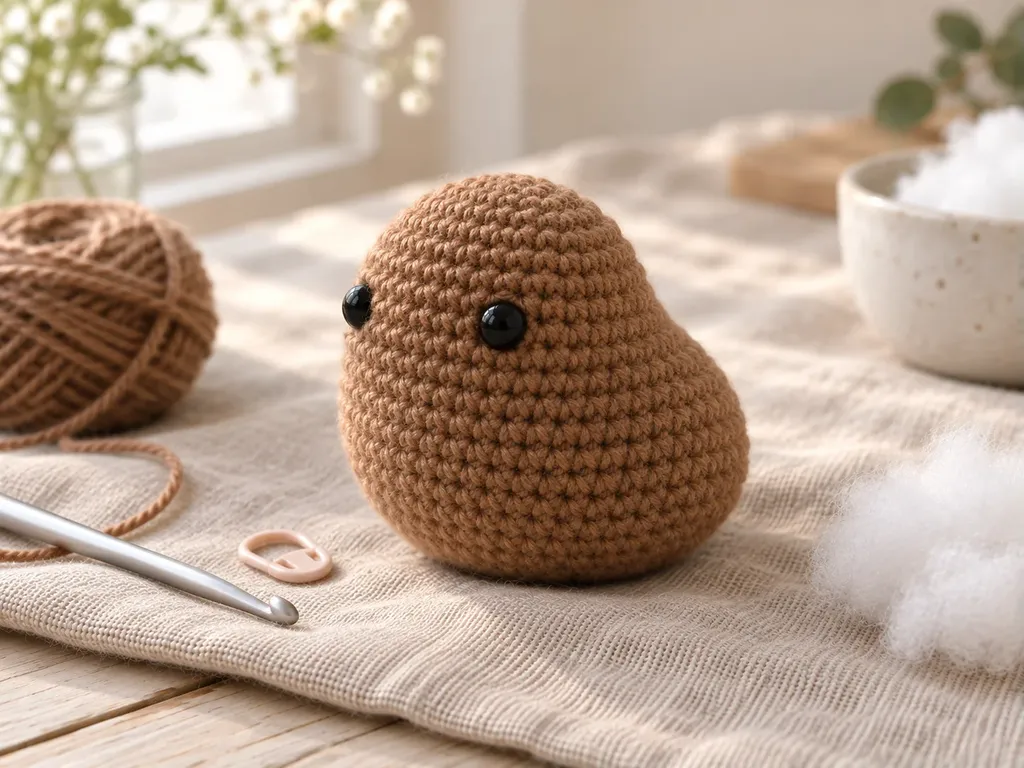
The body and head are one continuous shape worked in spiral rounds from the base to the crown. Rnd 14 staggers the increases so the head stays rounded instead of angular.
- Rnd 1: 6 sc in magic ring (6)
- Rnd 2: inc in each st around (12)
- Rnd 3: (sc, inc) x 6 (18)
- Rnd 4: (sc 2, inc) x 6 (24)
- Rnd 5: sc, inc, (sc 3, inc) x 5, sc 2 (30)
- Rnds 6-10: sc in each st around (30)
- Rnd 11: sc, dec, (sc 3, dec) x 5, sc 2 (24)
- Rnd 12: (sc 2, dec) x 6 (18)
- Stuff the lower body firmly, keeping the top open and soft enough to shape.
- Rnd 13: (sc 2, inc) x 6 (24)
- Rnd 14: sc, inc, (sc 3, inc) x 5, sc 2 (30)
- Rnds 15-19: sc in each st around (30)
- Insert the 6 mm safety eyes between Rnds 17 and 18, about 7 sts apart, or embroider the eyes instead.
- Rnd 20: sc, dec, (sc 3, dec) x 5, sc 2 (24)
- Rnd 21: (sc 2, dec) x 6 (18)
- Finish stuffing the head, shaping the front gently with your fingers.
- Rnd 22: (sc, dec) x 6 (12)
- Rnd 23: dec around (6)
- Fasten off, leaving a long tail. Thread through the front loops of the final 6 sts and pull closed.
 Save
SaveCrochet the belly patch
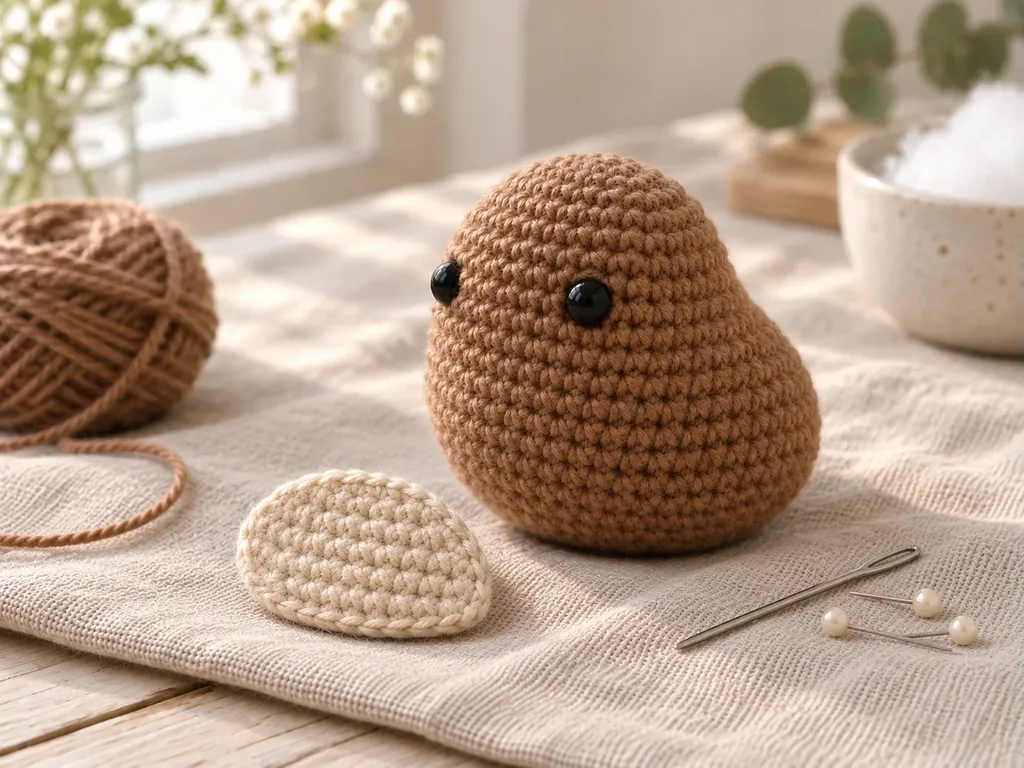
The tan belly patch is a small flat piece worked in rows. It should sit low on the front of the body, just under the eyes and beak.
- Row 1: ch 5, sc in 2nd ch from hook and in each ch across (4)
- Row 2: ch 1, turn, inc, sc 2, inc (6)
- Rows 3-5: ch 1, turn, sc in each st across (6)
- Row 6: ch 1, turn, sc2tog, sc 2, sc2tog (4)
- Row 7: ch 1, turn, sc2tog, sc2tog (2)
- Fasten off, leaving a long tail for sewing.
 Save
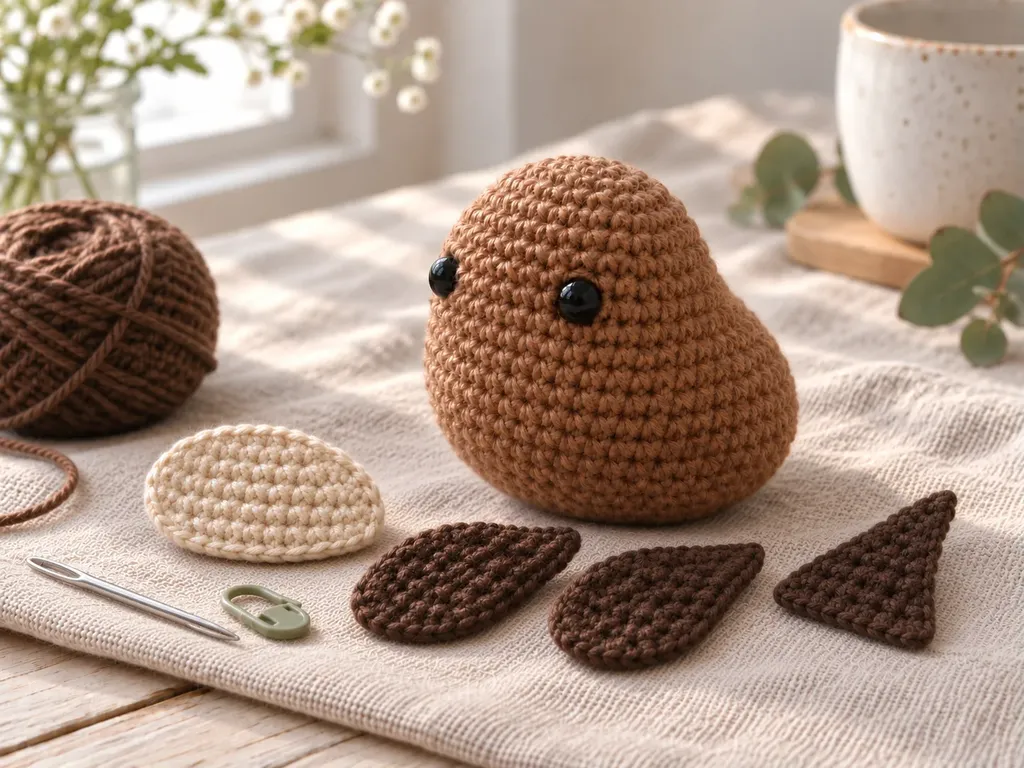
SaveCrochet the wings (make 2)
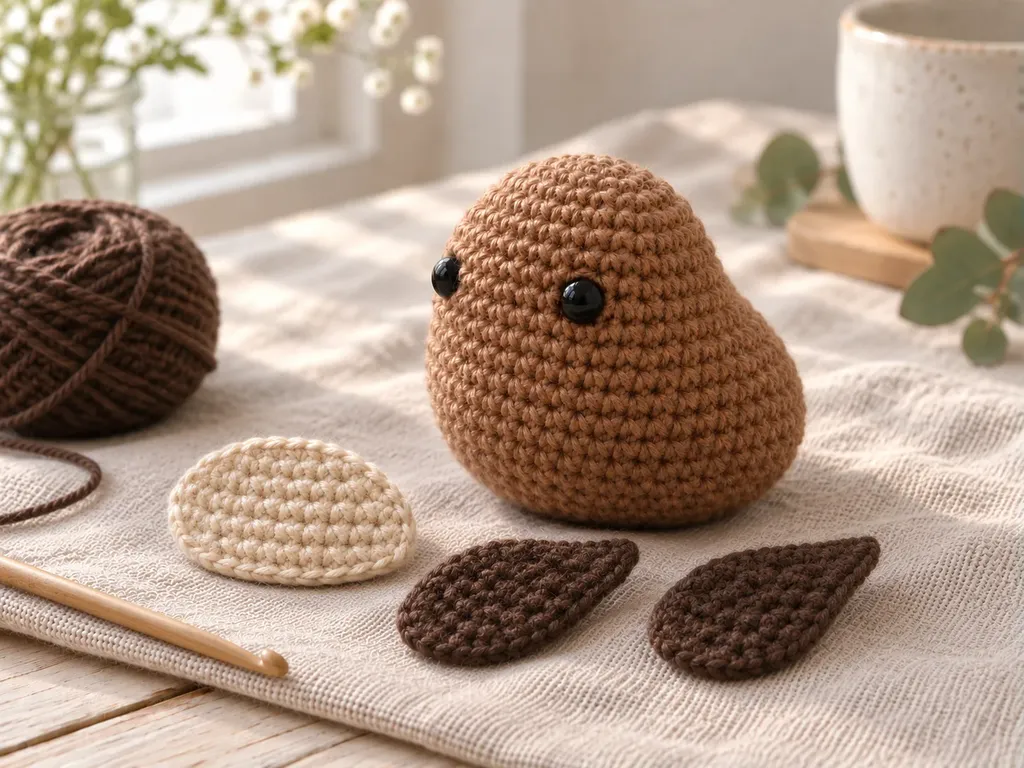
Make two matching dark brown wings. They are worked flat, then sewn to the sides with the pointed end angled slightly toward the tail.
- Row 1: ch 7, sc in 2nd ch from hook and in each ch across (6)
- Row 2: ch 1, turn, sc in each st across (6)
- Row 3: ch 1, turn, sc2tog, sc in each st across to last 2 sts, sc2tog (4)
- Row 4: ch 1, turn, sc in each st across (4)
- Row 5: ch 1, turn, sc2tog, sc2tog (2)
- Row 6: ch 1, turn, sc2tog (1)
- Fasten off, leaving a long tail on each wing.
 Save
SaveCrochet the upturned tail
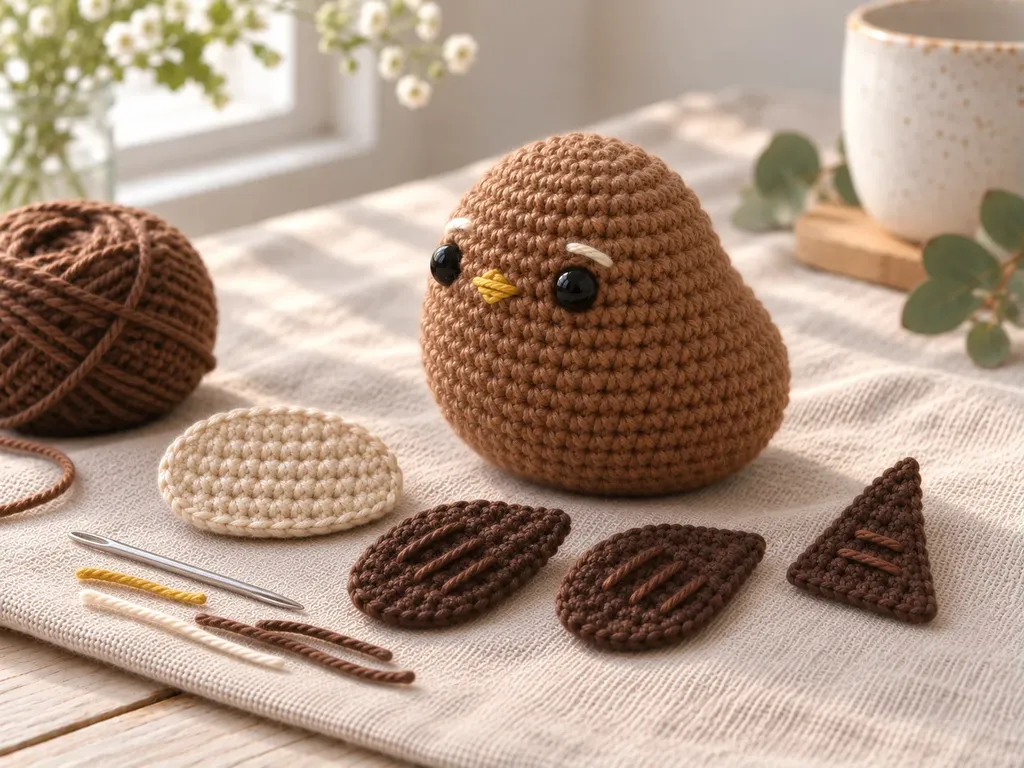
The tail is a narrow flat wedge. When you sew it on, tilt the pointed end upward to give the little bird its wren-like posture.
- Row 1: ch 8, sc in 2nd ch from hook and in each ch across (7)
- Row 2: ch 1, turn, sc in each st across (7)
- Row 3: ch 1, turn, sc2tog, sc 3, sc2tog (5)
- Row 4: ch 1, turn, sc in each st across (5)
- Row 5: ch 1, turn, sc2tog, sc, sc2tog (3)
- Row 6: ch 1, turn, sc2tog, sc (2)
- Fasten off, leaving a long tail for sewing.
 Save
SaveEmbroider the face and markings
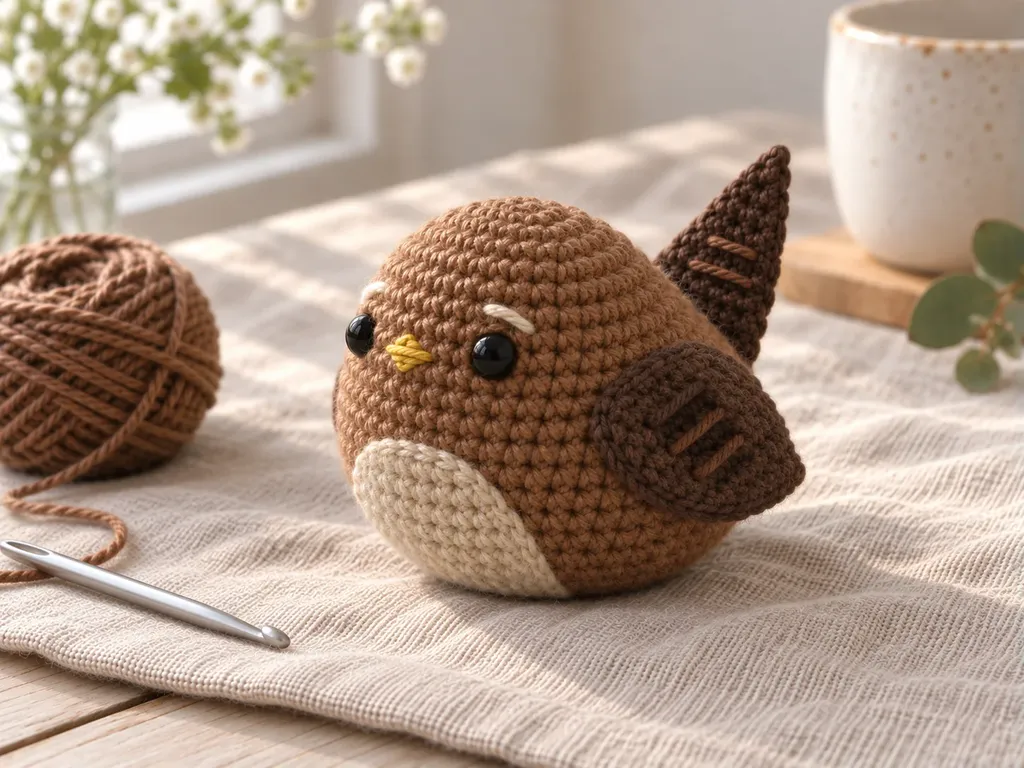
Use small, neat stitches so the markings stay delicate. Add the beak first, then the brow stitches, then the bars across the wings and tail.
- With golden yellow yarn, embroider a tiny beak centered between the eyes over Rnds 17 and 18.
- With cream yarn, add one short brow stitch above each eye.
- With dark brown yarn, embroider 3 short bars across each wing and 2 short bars across the tail.
- Weave the embroidery ends inside the body with a tapestry needle.
 Save
SaveAssemble and finish the wren
Pin the pieces in place before sewing so the bird can balance upright. I like the tail to sit just above Rnd 6 of the body and the wings to begin around Rnd 11.
- Sew the belly patch to the front of the body, centered under the face.
- Sew one wing to each side, with the wider end near the shoulder and the point angled back.
- Sew the tail to the back of the body, tilting it upward as you stitch around the base.
- Add a few tiny golden stitches low on the front for feet, if you like.
- Weave in all ends, then gently shape the head, belly and tail with your hands.
Before You Start
Your small wren is ready once the tail has that cheerful upward tilt and the wing bars look even. Try a rustier brown for an autumn bird, or soften the look with a cream belly and very light brow stitches.
Pattern FAQs
Can I make this amigurumi wren without safety eyes?
Yes. For a baby or toddler item, embroider the eyes instead of using 6 mm safety eyes. Place the embroidered eyes between Rnds 17 and 18, about 7 sts apart, just like the safety-eye placement. Use several small satin stitches and knot the yarn securely inside the head.
Why is the body and head worked as one piece?
Working the body and head in one piece keeps the little bird smooth and reduces sewing. The shape narrows at Rnds 11-12 for the neck, then widens again at Rnds 13-14 for the head. Stuff the lower body before the head gets too small to reach comfortably.
How do I keep the upturned tail from drooping?
Sew the tail base firmly to the back of the body and take a few extra stitches through the lower edge. The tail is flat, so it holds its angle best when the base is anchored over several body stitches. Avoid overstuffing the back of the body, which can push the tail down.
Can I use acrylic yarn instead of cotton?
You can use worsted weight acrylic if it gives you a firm fabric with the 3.5 mm hook. The finished bird may feel softer and slightly lighter than the cotton version. Check that the stuffing does not show through the stitches, especially around Rnds 15-23 on the head.
Where should the wing bars go?
Add the wing bars after the wings are sewn on or just before assembly if that feels easier. Three short dark stitches across each wing are enough. Keep them near the lower half of the wing so the top edge stays smooth for sewing to the side of the body.
What if my wren is taller than 4 in (10 cm)?
A slightly taller bird usually means your tension is looser or your yarn is thicker. That is fine as long as the stuffing is hidden and the toy feels firm. If you want a smaller finish, use a lighter worsted cotton or go down one hook size while keeping the stitches comfortable.
Standards & Sources
Terms and sizes in this pattern follow these standards.