
 Pin it
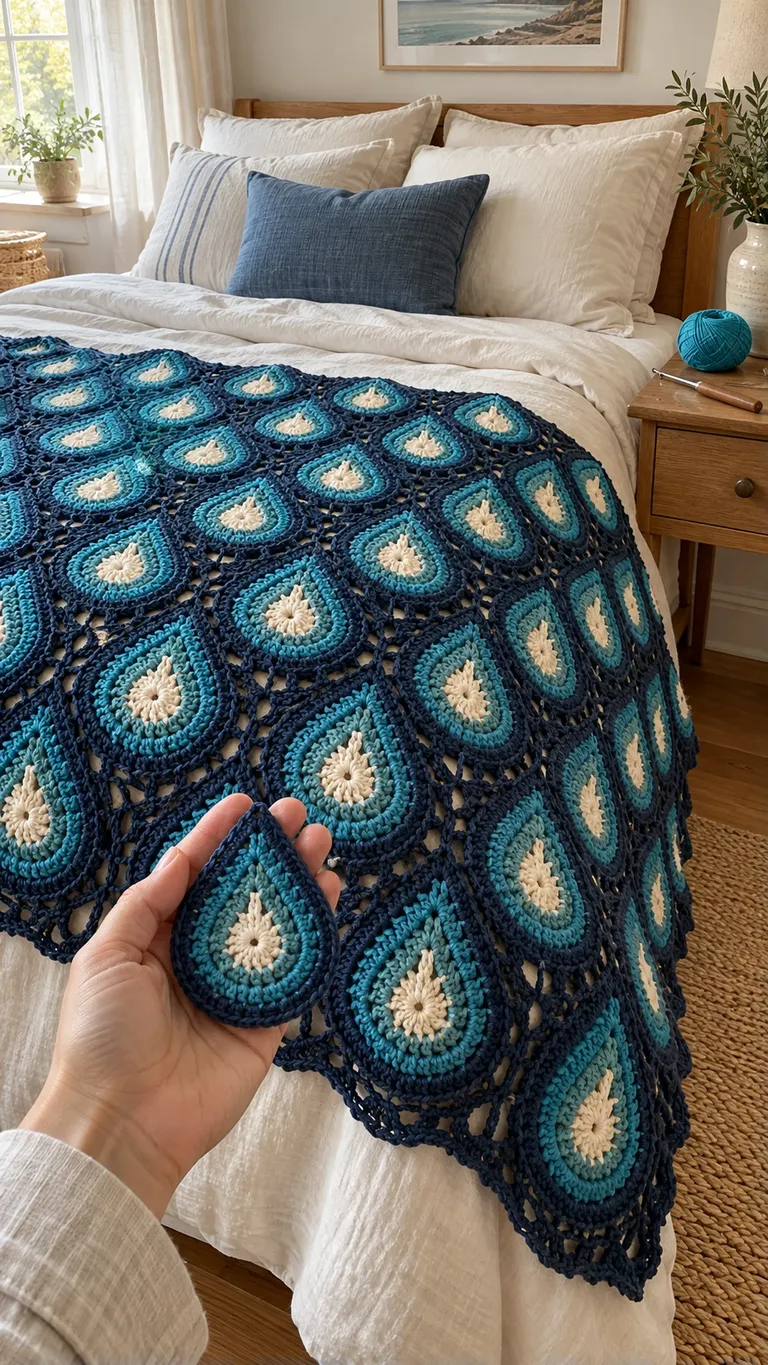
A teardrop outline gives a crochet throw a clear sense of direction. Navy, turquoise and ivory can make that movement gentle or quite bold, depending on which shade frames the motif. Before making a stack of pieces, work out how their pointed and rounded ends will meet.
About this design: This is a design-planning guide for an AI-generated throw concept, not a tested pattern for the pictured motifs. Use a complete published motif pattern for the stitches, shaping and joins. A short crochet sample in a showcase does not demonstrate how to make the whole throw.
Choose the motif before the arrangement
Find a complete pattern whose finished outline can be joined into the shape you need. A pointed motif may leave gaps that require planned filler pieces; it does not automatically tile into a rectangle. Read the joining and edging instructions before buying yarn. Check whether the pattern is written in US or UK terms and keep the terminology consistent throughout the project.
Make one motif exactly as written using the suggested hook and an appropriate yarn. Record its relaxed length and width after the recommended care treatment. Measure across consistent landmarks, such as the broadest part and the distance from the tip to the rounded end. Do not stretch a sample to fit a hoped-for measurement.
Test the three colors together
Place navy, turquoise and ivory beside the room's bedding in daylight. Navy can define the outside edge; ivory can separate neighboring blue areas. A narrow turquoise band creates a different effect from a large turquoise center, even when the same three yarns are used.
Work at least two neighboring samples before committing to one color order. Look at them close up, then step back. If the outline disappears at normal viewing distance, adjust the placement of the lightest shade in a new sample. Keep the chosen sequence in your notes, including which round or section changes color according to the actual pattern.
Draw the direction map
Sketch the proposed layout with a simple arrow inside each motif shape. All points facing one way create a strong flow. Alternating directions can create pairs, but it may change which edges touch and which gaps remain. Treat the sketch as a layout test, not proof that the pieces will join.
Lay out the physical samples with the right sides up. Compare the intended joins with the pattern's attachment points. If you cannot line up compatible edges without folding, stretching or leaving unplanned holes, revise the arrangement or choose a pattern designed for that layout.
Measure a joined sample
Join a small repeat using the pattern's stated method, then let it rest flat. The joined repeat is a better sizing reference than adding the widths of loose motifs. Seams, overlaps and filler pieces can change the space each motif occupies.
Use that repeat to plan the throw's approximate dimensions, allowing for the actual border method. Keep the desired bed coverage separate from the sample measurement: a decorative foot-of-bed throw needs a different layout from a larger blanket. Avoid promising an exact finished size until you have measured the construction you will use.
Organize pieces before joining
Group completed motifs by position and orientation. A removable marker at the same point on every piece can help keep the direction clear. Photograph the full arrangement before lifting any motifs from the table or floor, then work in manageable groups following the joining order in your pattern.
Check each new join on both sides. Stop if the seam draws the pieces into a cup or causes an edge to wave. Compare tension, stitch counts and attachment points with the instructions before adding more pieces. Finishing cannot reliably correct a structural mismatch.
Finish without losing the outline
Follow the yarn label and pattern guidance for washing and shaping. Support the full weight of the wet work, arrange it without stretching the pointed ends, and let it dry completely. Recheck the dimensions after the fabric has relaxed.
Save the pattern name, color order, hook, sample measurements and a photograph of the final layout. Those details make a matching cushion or a later repair easier to plan. This guide uses US crochet terms; the Craft Yarn Council abbreviation list is a useful reference when checking unfamiliar wording.
Before You Start
Keep motif direction and color order in a written layout. Follow the chosen pattern for stitches and joins, and finish according to the yarn care instructions.
Pattern FAQs
Does this guide include a complete teardrop motif pattern?
No. This is a design-planning guide. Choose a complete motif pattern for stitch counts, shaping and joining instructions.
Standards & Sources
Terms and sizes in this pattern follow these standards.