
 Pin it
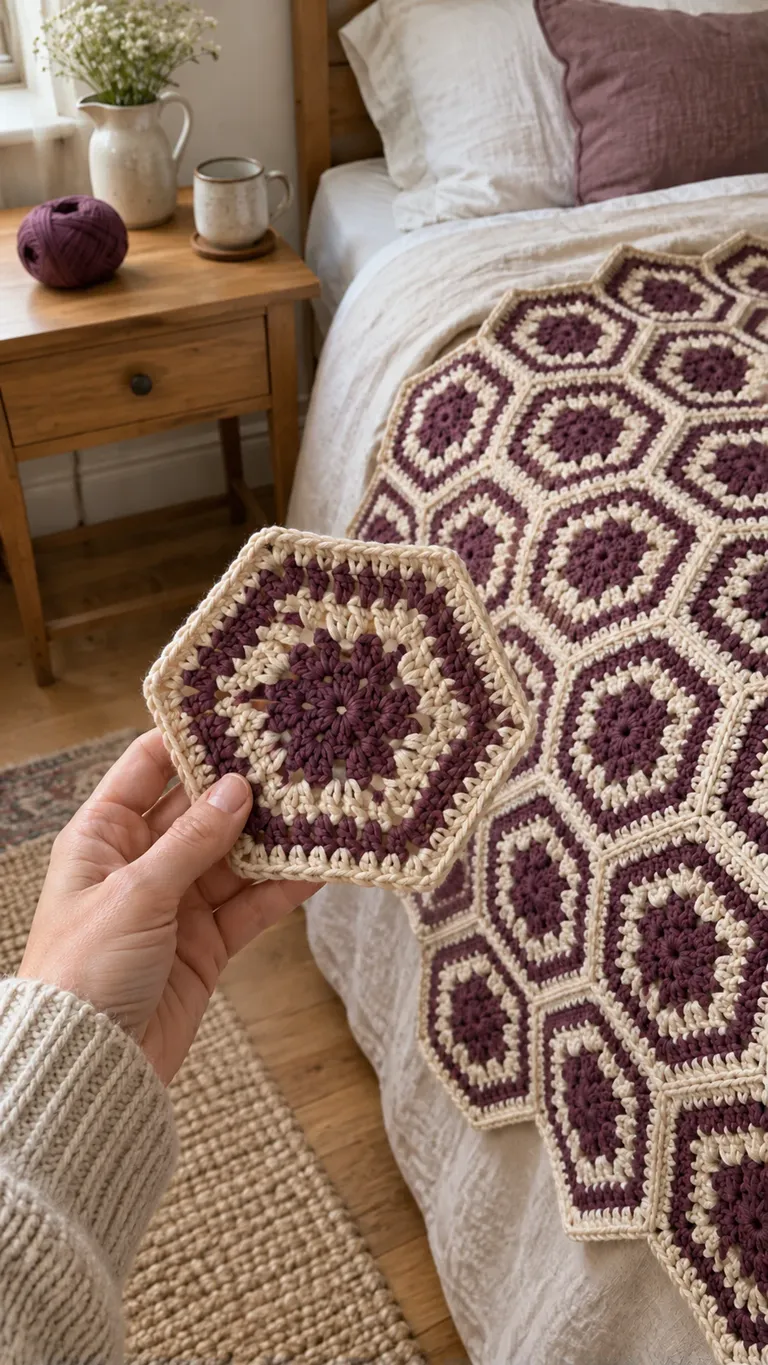
Plum centers and pale linen-colored borders give this hexagon throw a clear honeycomb arrangement. The six-sided shapes make a different outline from square motifs: each new row changes where the outer corners sit. Planning that outline before joining helps you choose a throw that sits comfortably across the foot of a bed.
About this design: The image and Reel are AI-generated design illustrations. This is a layout and sampling guide, not a tested pattern for the pictured hexagon. Use a complete hexagon pattern for stitch counts, increases, joining and edging. Do not derive stitch instructions from the generated close-up.
Start with a complete hexagon pattern
Choose a pattern that includes a flat six-sided motif and a compatible joining method. Check its terminology before starting. This guide uses US crochet terms; the Craft Yarn Council abbreviation list explains common abbreviations, while special stitches should follow the pattern's own definitions.
Make a full motif with the recommended hook and yarn weight. Include the final cream round, because that edge affects both size and the appearance of the join. If the sample cups or ripples, check the stitch count and tension against the pattern before making more. Blocking should follow the yarn's care guidance rather than force an incorrect shape flat.
Compare plum and cream in the actual room
Choose the two yarn colors together. A dark plum center can become difficult to read in low light, while the pale border makes the six sides easier to distinguish. Look at a finished sample beside the bedding in daylight and under the lamp you usually use in that room.
Keep the same color sequence when a uniform honeycomb effect is the aim. Write the color beside each round number in your chosen pattern. If you prefer alternating versions, make both versions before deciding their positions. Compare actual fabric rather than relying on product photographs alone.
Map the rows before making the full batch
Cut a few paper hexagons or sketch a honeycomb grid. Arrange them in staggered rows and mark which way each motif points. A layout with a point facing up behaves differently at its outside edge from one with a flat side facing up. Keep that orientation consistent in your plan.
Label the rows and count the motifs in each one separately. Add those row totals for the full-motif count; do not multiply the widest row by the number of rows if shorter rows are present. Photograph the plan and keep its count with your pattern notes. The paper arrangement shows placement, while the real joined sample establishes size.
Choose a stepped edge deliberately
Whole hexagons naturally leave an uneven outline along parts of a rectangular arrangement. That can be an intentional feature, as in this throw. Lay out several motifs across the intended end of the bed and look at the projecting corners and recessed spaces. Decide whether the outline suits the amount of overhang you want.
If you want straight sides, choose a pattern that supplies the necessary partial motifs and border instructions. Cutting a paper hexagon in half helps visualize a space, but it does not provide the crochet instructions for filling it. Do not improvise half-motif counts from the illustration or expect a narrow border to turn every stepped edge into a straight one.
Measure a joined group
Join a small group with the method specified by the pattern. Include a junction where several motifs meet so you can assess corner bulk, gaps and how the cream lines connect. Check that corresponding edges have compatible stitch counts and that the join lies comfortably without pulling either motif out of shape.
Care for the sample according to the yarn label, let it dry fully and measure the joined arrangement. Allow for the join and border when estimating the finished width. A single loose motif does not capture how the whole fabric will drape, so place the joined sample over the bedding as well as measuring it flat.
Keep the layout visible while assembling
Lay the finished motifs in their planned rows before committing to the joins. Use removable markers or labeled bags to preserve each row's order. Check the visible side, color sequence and orientation as you work; a rotated motif can be easy to miss when you are concentrating on the seam.
Finish ends and edging according to the selected pattern. Keep the pattern name, hook size, yarn labels, row map and joined-sample measurements together. These notes make it easier to extend the throw later while preserving its outline and color rhythm.
Before You Start
Use a row map, count each row separately and choose a tested approach to any partial motifs or border.
Pattern FAQs
Is this a tested pattern for the pictured throw?
Standards & Sources
Terms and sizes in this pattern follow these standards.