
 Pin it
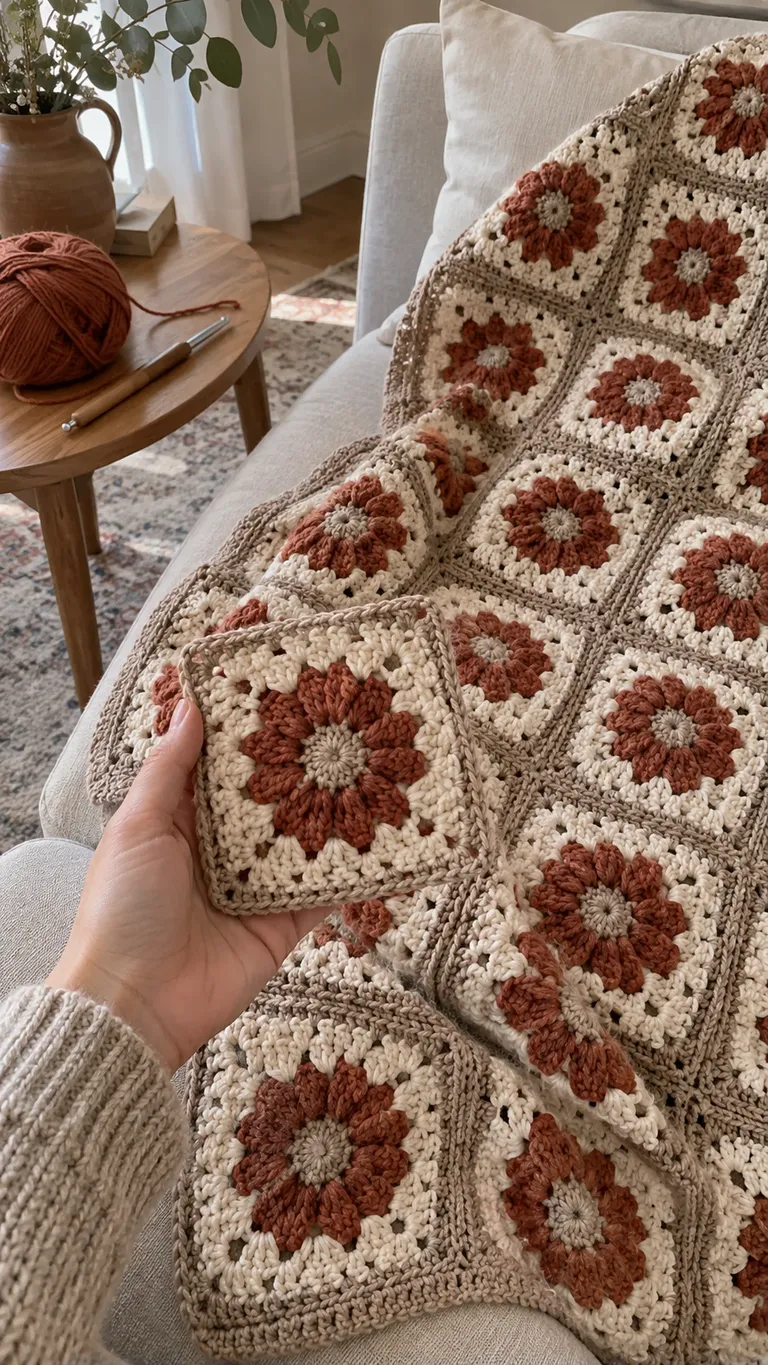
Terracotta flowers stand out against cream square surrounds, while sand-colored seams connect the motifs without becoming the main feature. This warm palette suits a linen sofa, but the balance comes from how much of each shade is visible, not simply from choosing three yarn colors.
About this design: The image and Reel are AI-generated design illustrations. This is a guide to color, sampling and layout, not a tested pattern for the pictured flower square. Choose a complete flower-square pattern for stitch counts, shaping and joins. The Reel's foundation-chain sample shows yarn handling; it does not demonstrate construction of the flower motif.
Choose the flower square first
Start with a complete pattern that includes the flower, square surround and joining instructions. Check that the finished motif is intended for a blanket and that its edge offers compatible joining points. A raised flower center and a flat square surround need different shaping; the photograph cannot supply the missing stitch counts.
Read the pattern's terminology before making a sample. This guide uses US crochet terms. The Craft Yarn Council abbreviation list can help with unfamiliar abbreviations, but any special stitches should be explained by the pattern itself. Keep those definitions beside your work.
Give the flower enough contrast
Place terracotta, sand and cream yarn together in daylight near the sofa. A pale center separates the flower's middle from its petals, while the cream surround gives the terracotta an uninterrupted outline. A sand edge can make neighboring squares feel connected without adding another strong stripe.
Make a full square before judging the palette. Small yarn strands do not show how a large cream area changes the apparent strength of the flower. Try a second sample if the terracotta feels too dominant or the sand edge disappears. Record the color used for each round or section in your chosen pattern.
Compare loose and joined samples
Let each sample rest flat without stretching. Check the square's sides and corners against the pattern and compare the dimensions of several motifs. If a flower pulls its surround into a cup, check the stitch counts and tension before making more. Blocking should follow the yarn and pattern guidance, not conceal a construction problem.
Join a small group using the specified method and the intended sand yarn. Look at the join from both sides. Notice whether it lies flat, forms a deliberate ridge or tightens the neighboring edges. The join is part of the design, so decide on its appearance while the sample is still small.
Measure the repeat you will actually use
Care for the joined sample as recommended on the yarn label, let it dry fully and measure it at rest. Use consistent landmarks and write down the sample's width and height. A joined group is a more useful sizing reference than adding the measurements of separate loose squares.
Measure the area you want the throw to cover and allow for the border described in your pattern. A throw folded across a sofa arm needs a different arrangement from one spread across a seat. Estimate rows and columns from the measured repeat, then check that the proposed layout works with the joining and edging instructions.
Lay out the flowers before assembly
Arrange completed motifs with the right sides facing up. Check for accidental changes in color order, differently sized squares or an unfinished edge. If the handmade variation is small and compatible with the pattern, distribute it across the layout rather than placing all the slightly darker pieces in one corner.
Photograph the arrangement and label rows with removable markers before lifting the squares. Join in the order your pattern recommends, supporting the weight of the growing fabric. Recheck the first few seams before continuing across the whole throw; correcting a tight join is easier before more rows are attached.
Finish with the same quiet palette
Use the pattern's border and yarn care directions. A cream or sand border can continue the calm surrounds, while a terracotta edge makes a stronger frame. Test the border on your joined sample if you are choosing between colors, and watch the corners for pulling or waves.
Secure loose ends in a way suited to the yarn and construction, then inspect both sides for missed joins. Save the pattern name, hook size, yarn labels, color sequence and sample measurements. These notes give you a reliable starting point for a matching cushion or replacement square later.
Before You Start
Use the finished sample to choose colors and size. Check joins early and keep the pattern, yarn and layout notes together.
Pattern FAQs
Is this the pattern for the pictured flower square?
No. This is a color and construction-planning guide. Use a complete flower-square pattern for the actual stitches and shaping.
Standards & Sources
Terms and sizes in this pattern follow these standards.